Free setup! Speak with us anytime: 480-624-2500
Add a CNAME Record
A CNAME (Alias) record points to an A (Host) record. You can create multiple CNAME records and point them to an A record. The most common CNAME records are the subdomains www and ftp.
CNAME records make your DNS data easier to manage. If you change the IP address of an A record, all CNAME records pointed to that A record automatically follow the new IP address. The alternative solution, multiple A records, is not as simple as using CNAME records.
- Log in to your GoWebsite account.
- Next to Domains, click Manage.
How you now access the DNS manager will depend on the view of your account.
If your domain is registered at another company, see the Domains registered at another company section below for instructions.
Card View
In Card View, your account will look something like this:
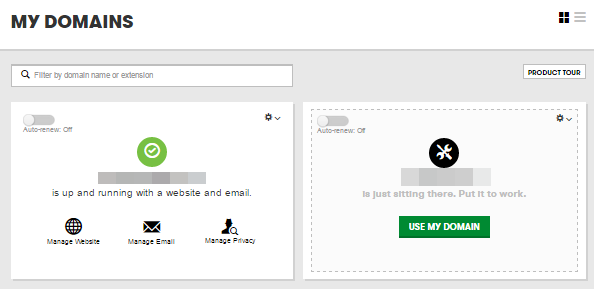
- Select the domain name you want to use, click
 (Settings) and select Manage DNS.
 - At the bottom of the Records section, click Add and select CNAME from the drop-down list.
- Complete the other fields:
- Name — Enter the subdomain name for the alias assignment. For example, type www.
The subdomain can include a period (.) but not as the first or last character. Consecutive periods (...) are not allowed. A subdomain cannot exceed 25 characters.
- Value — Enter the host name you want the alias to point to. For example, type @ to map the alias directly to your domain name.
- TTL — Select how long the server should cache the information.
- Name — Enter the subdomain name for the alias assignment. For example, type www.
- Click Save.
List View
In List View, your account will look something like this:
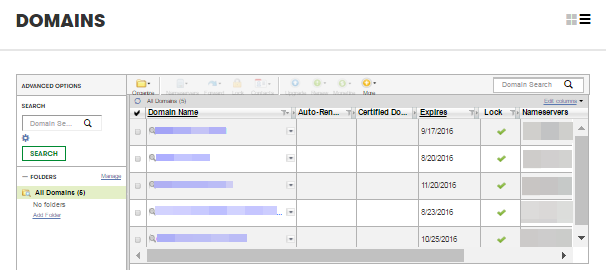
- Click the domain name you want to use.
- Click the DNS Zone File tab.
- Click Add Record.
- From the Record type list, select CNAME (Alias).
- Complete the following fields:
- Host: — Enter the subdomain name for the alias assignment. For example, type www.
- Points to: — Enter the host name you want the alias to point to. For example, type @ to map the alias directly to your domain name.
- TTL: — Select how long the server should cache the information.
- Click Finish, then click Save Changes.
You can click Restore Defaults in the CNAME (Alias) section of the Zone File Editor to restore the default CNAME records for your domain name.
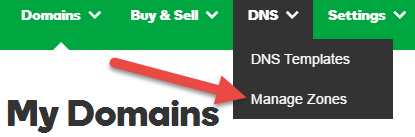
Domains registered at another company
- From the top menu, click the DNS tab, and select Manage Zones.
- Enter the domain name you want to use and click Search.
- At the bottom of the Records section, click Add and select CNAME from the drop-down list.
- Complete the other fields:
- Name — Enter the subdomain name for the alias assignment. For example, type www.
The subdomain can include a period (.) but not as the first or last character. Consecutive periods (...) are not allowed. A subdomain cannot exceed 25 characters.
- Value — Enter the host name you want the alias to point to. For example, type @ to map the alias directly to your domain name.
- TTL — Select how long the server should cache the information.
- Name — Enter the subdomain name for the alias assignment. For example, type www.
- Click Save.