
Free setup! Speak with us anytime: 480-624-2500
Adding and Editing Tables
Tables are useful for displaying information in rows and columns, making it easier to scan information. You can format a table's text when you create it, or edit those settings afterward. You also can edit table elements, such as its cells, rows and columns.
- Log in to your GoWebsite account.
- In your Products list click Website Builder, and then click Manage next to the account you want to use.
- Click Edit Website.
- To add a table, drag and drop
 onto the page.
 - Double-click within the dotted text box to display the text box editor, then click the editor's table button.
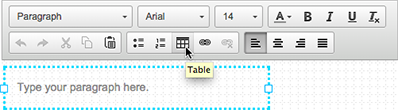
Go ahead and delete 'Type your paragraph here.' from the text box.
- Choose how many rows and columns you need. You also can set the table's width, height, header, cell spacing and padding, as well as its border size and alignment. If desired, enter a caption and summary.
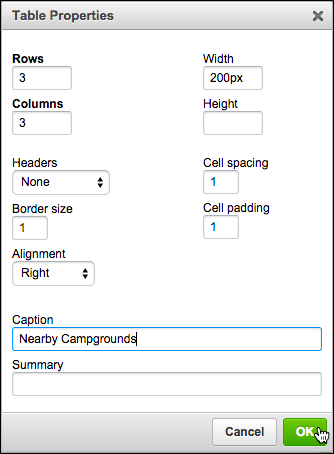
The Headers menu is set to None by default, but lets you choose whether to boldface the First Row, First Column, or Both.
- Click OK and the table is added to your page.
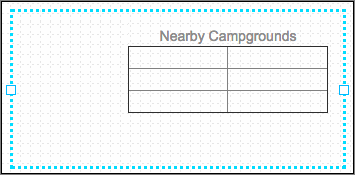
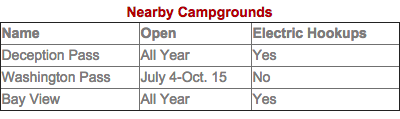
NOTE: As this screenshot shows, the Alignment setting is applied to the table's position within the blue dotted text box, not to the table's content, such as the caption.
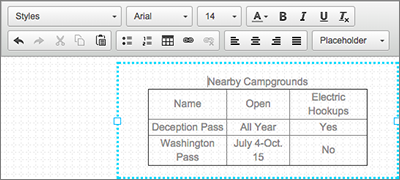
- Click inside any cell to enter your content.
To Edit a Table
- Log in to your GoWebsite account.
- In your Products list click Website Builder, and then click Manage next to the account you want to use.
- Click Edit Website.
- Double-click the table to display the text box editor.
- Select the text you want to change inside the table.
- Click the appropriate button within the text box editor to change your selection, or press your Delete key to remove it.

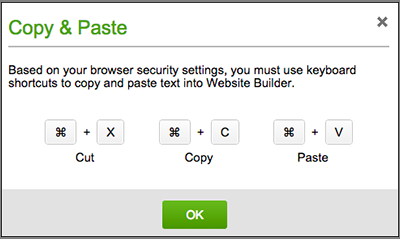
Depending on your Web browser settings, clicking the text box editor's Cut, Copy or Paste buttons will trigger an alert telling you to use your keyboard shortcuts. (Also see Add text.)
- To change more than the table's formatting, double-click the table and then right-click a table element (such as a cell, row or column) and make a choice from the main menu and its sub-menu.
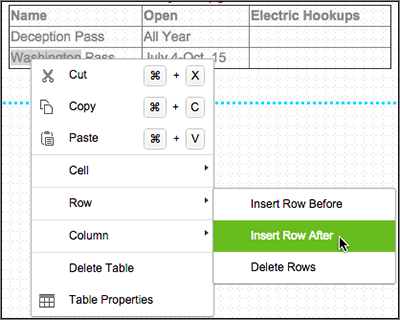
- Repeat the action to edit other table elements. Your choices include:
Table Element Choices Cell Insert Cell Before or After, Delete Cells, Merge Cells, Merge Right or Left, Split Cell Horizontally or Vertically, and Cell Properties Row Insert Row Before or After, Delete Rows Column Insert Column Before or After, Delete Columns - Click Publish (and again when asked to confirm the action) to update your Website online, then click the confirmation window's link to see the changes.
Next Step
- For a linked list of Website Builder's most commonly used tasks, see Using Website Builder.