
Organizing Pages with Navigation Menus in Website Builder v7
NOTE: This article is for Website Builder version 7. Your version displays at the top of the screen when you log in to your Website Builder account. Not using version 7? Search Website Builder version 6 articles.
Most websites include multiple pages, such as About Us and Contact. It's important to organize your pages in a way that makes sense for your website. Adding a navigation menu to your Website, which displays at the top of every page on your Website, offers a powerful way to help visitors find their way around. If over time, some menus become crowded with page links, you can add submenus.
To Organize Pages with Navigation Menus in Website Builder v7
- Log in to your Website Builder account.
- Click Edit Website.
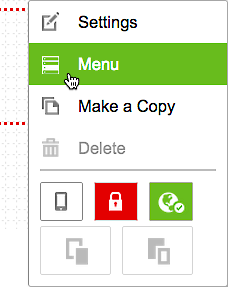
- Click at the edge of your website's navigation menu and select Menu.
NOTE: If your website does not yet have a navigation menu, get started by dragging the Navigation tool from the left-hand toolbar onto any page.

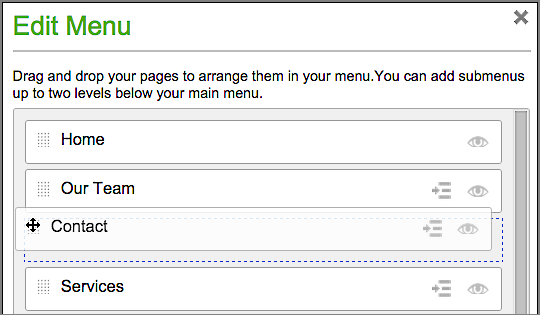
- Use Edit Menu to drag and drop your pages in the order you want them to appear in the navigation menu.
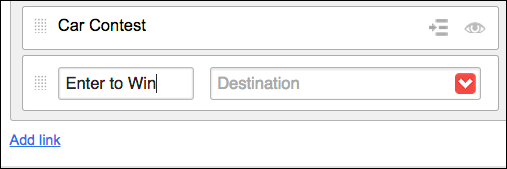
- If you need to add more navigation/menu links, click Add link, enter a page title in the new, blank field and use the Destination menu or field to link the menu item to a new page.
- To hide a menu (e.g. a sales page), click that item's eye icon.
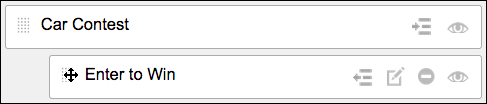
- To create a submenu, click that item's indent icon. Or click on a menu item's dotted grid and drag the item under and to the right of another menu item.
- Click Save to apply the changes and close the Edit Menu window.
- Take a look at your new menu.

- If you need to change it, start again with Step 3. Once you're happy with the results, click Publish to update your Website online.
NOTE: For a linked list of Website Builder v7's other major tasks, see Using Website Builder v7.