
GoWebsite provides Domain Name Registration,
cPanel Hosting,
Website Security,
SEO, WordPress
Hosting, Email Accounts,
SSL Certificates,
Website Builder & other
Web Development Products.
Free setup! Speak with us anytime: 480-624-2500
Free setup! Speak with us anytime: 480-624-2500
Outlook 2013: Manually Set up Email
These instructions are specific to setting up Workspace email. If you need to manually set up Outlook with Office 365 email, please see: Outlook: Manually set up email
These instructions are only applicable to Outlook 2013 on a PC. Click here for instructions on how to manually set up Outlook 2010.
- Open Outlook.
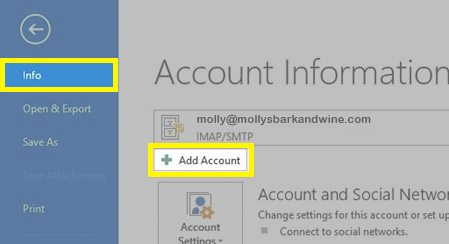
- Click File.
- Under Info, click Add Account.
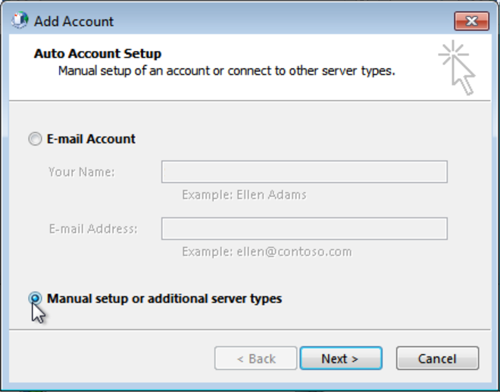
- Select Manual setup or additional server types, and then click Next.
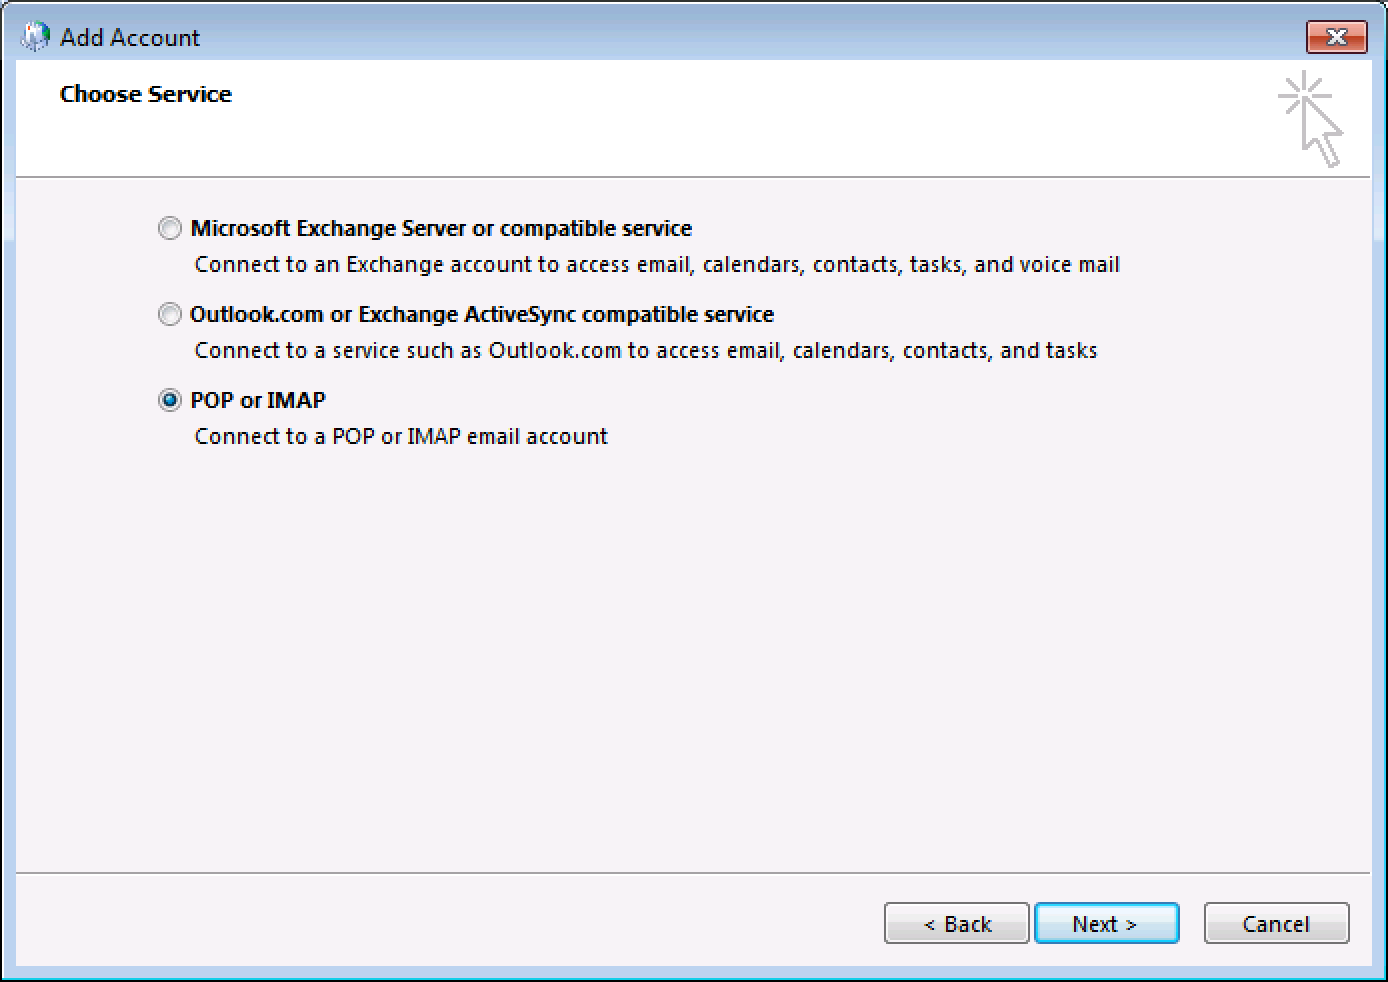
- Select POP or IMAP, and then click Next.
- Complete the following fields:
Field Enter Your Name What you want your display name to be for this account Email Address Your full Workspace email address Account Type Select either POP3 or IMAP, depending on your account.
Not sure? Learn how to find out what account type you have.Incoming and Outgoing mail server Enter the server addresses displayed in your Email Setup Center.
Read more about the Email Setup Center.User Name Your full Workspace email address Password Your Workspace email account password Remember password Select this option Require logon using Secure Password Authentication Deselect this option 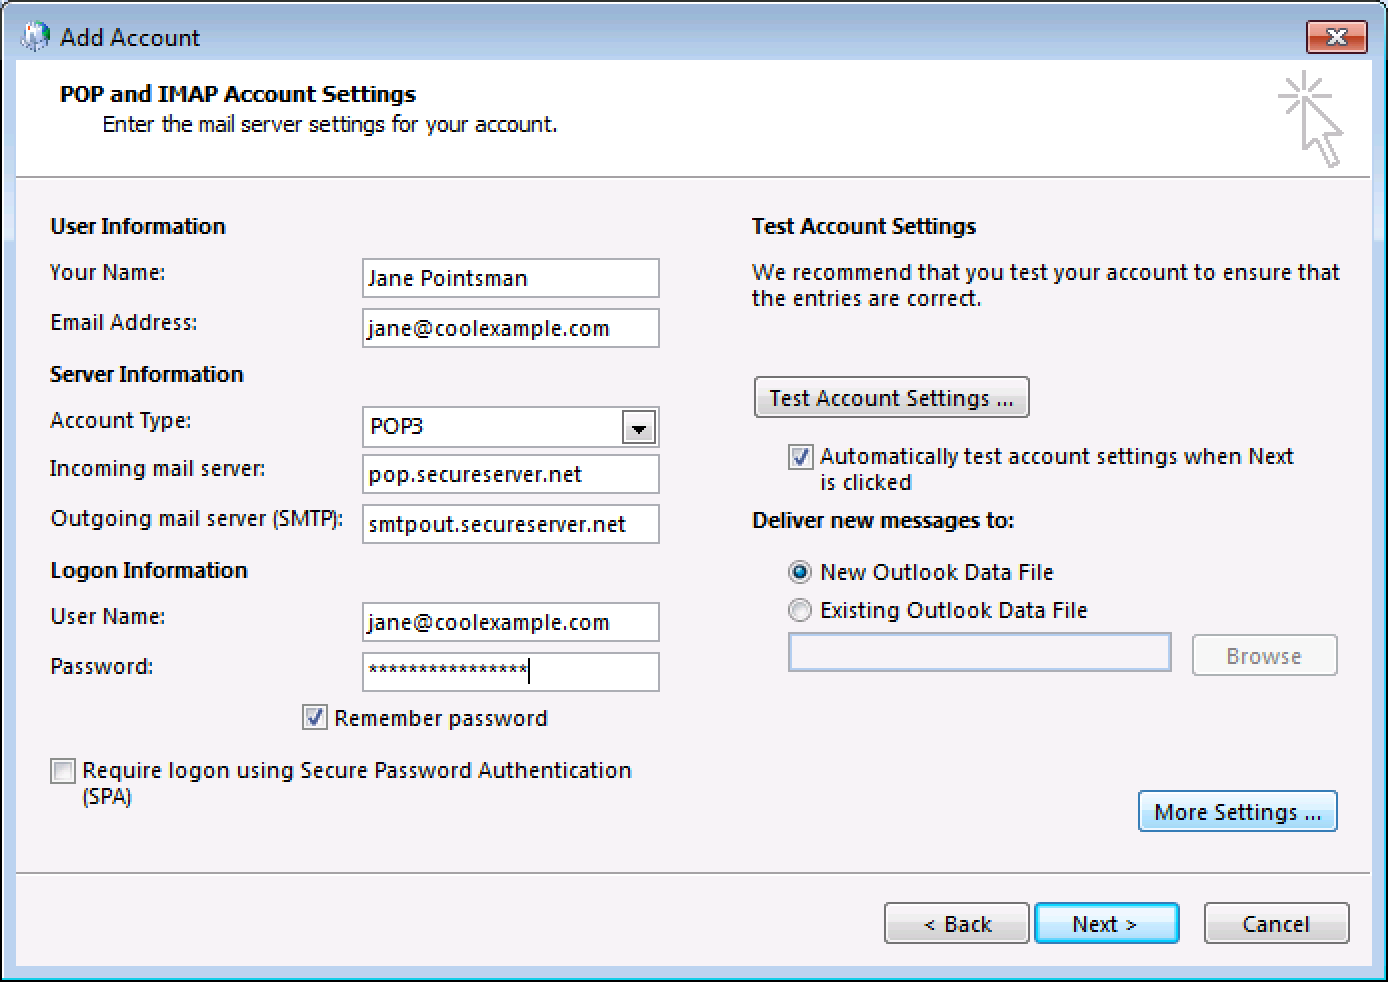
- Click More Settings...
- Go to the Outgoing Server tab, and then complete the following fields:
Field What to do... My outgoing server (SMTP) requires authentication Select this option Use same settings as my incoming mail server Select this option 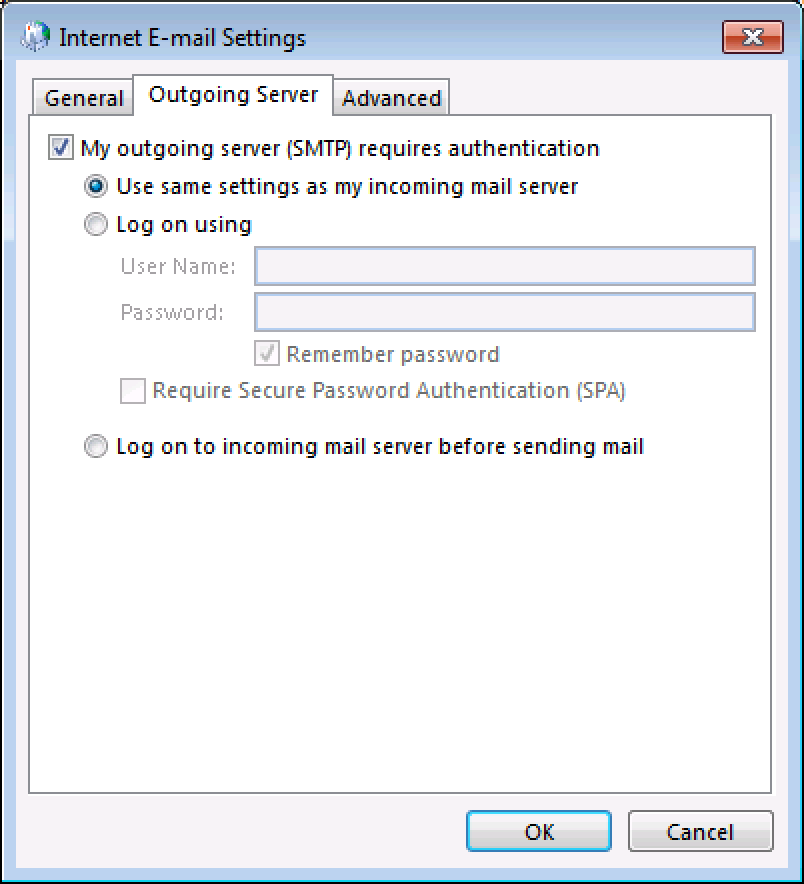
- Go to the Advanced tab, and complete the following fields:
Field What to do... Incoming server Enter one of the incoming ports, listed in your Email Setup Center. This server requires an encrypted connection (SSL) If the port is listed in black in your Email Setup Center, deselect this option. If it is listed in orange, select this option. Outgoing server (SMTP) Enter one of the outgoing ports, listed in your Email Setup Center. Use the following type of encrypted connection If the port is listed in black in your Email Setup Center, set this to None. If it is listed in orange, set this to SSL. Server Timeouts This selection is up to you. Leave a copy of messages on the server This option is up to you. If you have a POP account, and you will be using more than one way to access your email, you should select this. Leaving a copy on the server will use up your email storage limit, faster.
Learn about the differences between POP and IMAP for more.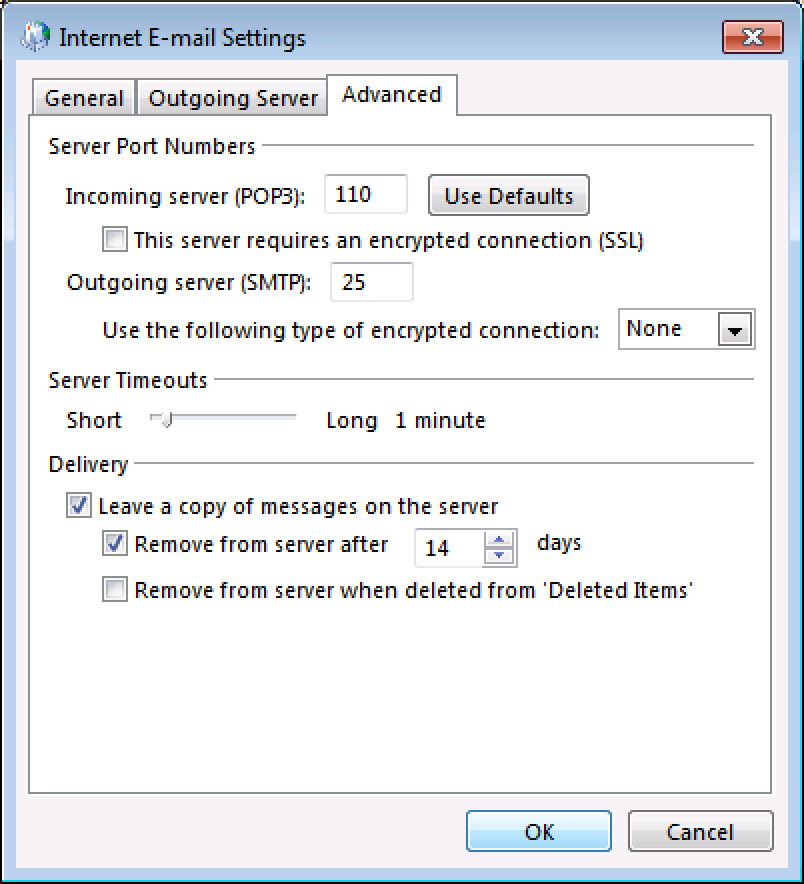
- Click OK.
- In the Add Account window underneath, click Next.
- Click Finish.
As a troubleshooting step, select Log on using. Then enter your User Name, and your Password. Use your full Workspace email address as your User Name.
Next Steps
You now should be able to open Outlook and send and receive your Workspace email. If you are still having trouble, check out: Outlook 2010 and 2013: Troubleshooting Email
More Info
Domain Registration
Pay less for website domain names. Register your own .com, .net or .org for as low as $10.18 per year. We have everything you need to get online with your new domain.Website Builder
Build an amazing website in just under an hour with Website Builder. Take advantage of designs created just for your industry and then customize them to reflect your one-of-a-kind idea.Website Security
Protect your website and keep customers safe. Your comprehensive Website Security solution. Get peace of mind by securing your websites.cPanel Hosting
Everything needed to give your website the high-performance home it deserves. Protect transactions and secure your customer's data with a SSL Certificate
Copyright © 2005 - 2024. All rights reserved.
Privacy Policy