Free setup! Speak with us anytime: 480-624-2500
Add an MX Record
Mail servers send and receive email messages on the Internet. MX (Mail Exchanger) records specify and prioritize the incoming mail servers that receive email messages sent to your domain name. There is often no need to modify your MX records. Sometimes you have to update them if you host a website with one network (such as ours) but you have email hosted in another. For more infomation, see What is an MX record?.
You cannot set up your domain name to use more than one mail provider at a time. If you have an email account through another email provider and change your MX record to point to our mail servers, you will not have access to your original email account.
- Log in to your GoWebsite account.
- Next to Domains, click Manage.
How you now access the DNS manager will depend on the view of your account.
If your domain is registered at another company, see the Domains registered at another company section below for instructions.
Card View
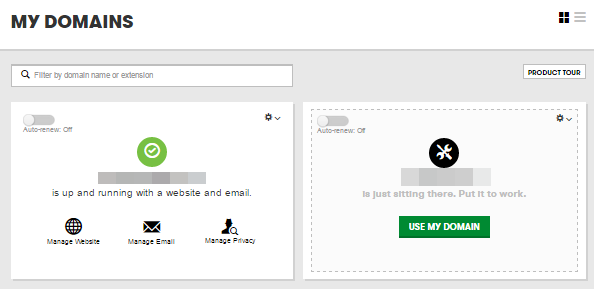
In Card View, your account will look something like this:

- Select the domain name you want to use, click
 (Settings) and select Manage DNS.
 - At the bottom of the Records section, click Add and select MX from the drop-down list.
- Complete the following fields:
- Name: Enter the domain name or subdomain for the MX record. For example, type @ to map the record directly to your domain name, or enter the subdomain of your host name, such as www or ftp.
- Value: Enter the mail server's address, such as smtp.secureserver.net.
- Priority: Enter, or select the priority you want to assign to the mail server.
- TTL — Select how long the server should cache the information.
- Click Save.
List View
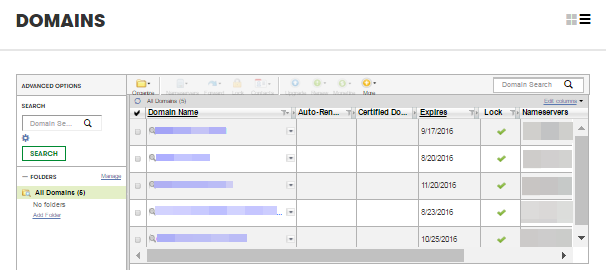
In List View, your account will look something like this:

- Click the domain name you want to use.
- Click the DNS Zone File tab.
- Click Add Record.
- From the Record type list, select MX (Mail Exchanger).
- Complete the following fields:
- Host: Enter the domain name or subdomain for the MX record. For example, type @ to map the record directly to your domain name, or enter the subdomain of your host name, such as www or ftp.
- Points to:: Enter the mail server's address, such as smtp.secureserver.net.
- Priority:: Enter, or select the priority you want to assign to the mail server.
- TTL: — Select how long the server should cache the information.
- Click Finish, then click Save Changes. The new MX record displays in the MX (Mail Exchanger) section.
Domains registered at another company
- From the top menu, click the DNS tab, and select Manage Zones.
- Enter the domain name you want to use and click Search.
- At the bottom of the Records section, click Add and select MX from the drop-down list.
- Complete the following fields:
- Name: Enter the domain name or subdomain for the MX record. For example, type @ to map the record directly to your domain name, or enter the subdomain of your host name, such as www or ftp.
- Value: Enter the mail server's address, such as smtp.secureserver.net.
- Priority: Enter, or select the priority you want to assign to the mail server.
- TTL — Select how long the server should cache the information.
- Click Save.

Next Step
Domain Registration
Pay less for website domain names. Register your own .com, .net or .org for as low as $10.18 per year. We have everything you need to get online with your new domain.Website Builder
For as little as $3.89 per month you can build your Website online with Website Builder using our easy to use professional templates. Play Video - Demo
Quick Shopping Cart
Build and run your own successful online store in minutes. You're just five easy steps away! Shopping Cart works with Google® and eBay® Play Video
Website Hosting
Everything needed to give your website the high-performance home it deserves. Protect transactions and secure your customer's data with a SSL Certificate
