
Free setup! Speak with us anytime: 480-624-2500
Change an NS Record
If your domain name is registered with us, use the following instructions to update its nameservers depending how you use or host the domain name.
- Log in to your GoWebsite account.
- Next to Domains, click Manage.
How you now access the DNS manager will depend on the view of your account:
If your domain is registered at another company, see the Domains registered at another company section below for instructions.
Card View
In Card View, your account will look something like this:
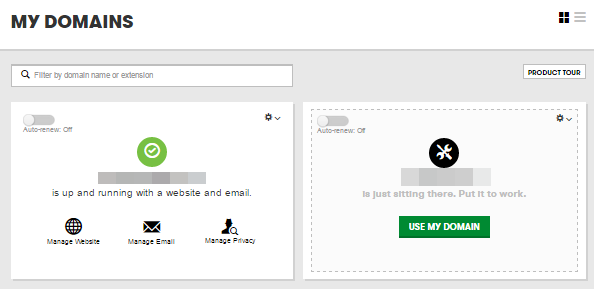
- Select the domain name you want to use, click
 (Settings) and select Manage DNS.
 - In the Nameservers section, click Change.
- Select Default or Custom from the menu.
- If you select Custom, enter your nameservers in the fields.
- Click Save.
If you need to enter more than two nameservers, click Add Nameserver.
After you add custom nameservers, your DNS will continue to display in our system for up to 48 hours. After your update propagates, you can no longer access your DNS in our system. You must contact your third-party provider to set up corresponding zone files for the domain name to make any future updates.
List View
In List View, your account will look something like this:
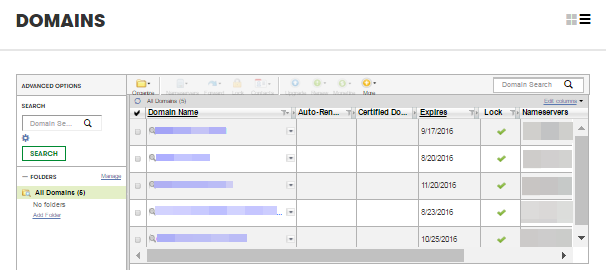
- Click on the domain name you want to use.
- Select the DNS Zone File tab.
- Click Edit:
- In the Nameservers section, click Change.
- Select Default or Custom from the menu.
- If you select Custom, enter your nameservers in the fields.
- Click Save.

If you need to enter more than two nameservers, click Add Nameserver.
After you add custom nameservers, your DNS will continue to display in our system for up to 48 hours. After your update propagates, you can no longer access your DNS in our system. You must contact your third-party provider to set up corresponding zone files for the domain name to make any future updates.
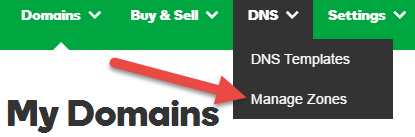
Domains registered at another company
- From the top menu, click the DNS tab, and select Manage Zones.
- Enter the domain name you want to use and click Search.
- In the Nameservers section, click Change.
- Select Default or Custom from the menu.
- If you select Custom, enter your nameservers in the fields.
- Click Save.
If you need to enter more than two nameservers, click Add Nameserver.
After you add custom nameservers, your DNS will continue to display in our system for up to 48 hours. After your update propagates, you can no longer access your DNS in our system. You must contact your third-party provider to set up corresponding zone files for the domain name to make any future updates.
Next Step
Domain Registration
Pay less for website domain names. Register your own .com, .net or .org for as low as $10.18 per year. We have everything you need to get online with your new domain.Website Builder
For as little as $3.89 per month you can build your Website online with Website Builder using our easy to use professional templates. Play Video - Demo
Quick Shopping Cart
Build and run your own successful online store in minutes. You're just five easy steps away! Shopping Cart works with Google® and eBay® Play Video
Website Hosting
Everything needed to give your website the high-performance home it deserves. Protect transactions and secure your customer's data with a SSL Certificate