
GoWebsite provides Domain Registration,
Website Hosting,
On-Line Shopping Carts,
SEO, WordPress
Hosting, Email Accounts,
SSL Certificates,
Website Builder & other
Web Development Products.
Free setup! Speak with us anytime: 480-624-2500
Free setup! Speak with us anytime: 480-624-2500
Delete Image
You can delete images from your website pages, as well as remove them from your list of previously used images.
- Log in to your Website Builder account.
- Click Edit Website.
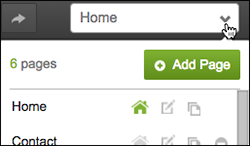
- Click the page menu to choose a page where you want to delete an image.
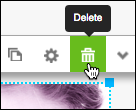
- Click the image you want to delete from a page, then click the trash can in the image tool bar.
You cannot delete multiple images at once, they need to be deleted individually.
-
When you're done making changes, click Publish to update your Website online.
Previously used photos appear in your My Photos list. To remove a photo from that list, click an image and then click the trash can in the photos upper left.

Next Steps
Domain Registration
Pay less for website domain names. Register your own .com, .net or .org for as low as $10.18 per year. We have everything you need to get online with your new domain.Website Builder
For as little as $3.89 per month you can build your Website online with Website Builder using our easy to use professional templates. Play Video - Demo
Quick Shopping Cart
Build and run your own successful online store in minutes. You're just five easy steps away! Shopping Cart works with Google® and eBay® Play Video
Website Hosting
Everything needed to give your website the high-performance home it deserves. Protect transactions and secure your customer's data with a SSL Certificate
Copyright © 2005 - 2020. All rights reserved.
Privacy Policy